How can I set up iTunes/Finder to Backup my iPhone to An External Drive?
No ratings yet.
iTunes and Finder write your iPhone and iPad backups to a folder in your computer user account's area designated for "app storage" as is recommended for third party apps on macOS and Windows. The great thing about this is that your backups are stored in your user account data, keeping them separate from backups made by other user accounts on the computer (and protected by your user accounts setup if you share your computer). The not great thing about user account storage is that it's usually on the "primary" hard drive, which can cause you to run into drive-space limitations on the primary drive.
On Windows, your user account data is stored in the %appdata% folder which is usually something like C:\Users\your username\AppData\Roaming but varies by Windows configurations. On macOS, your user account data is stored in ~/Library/Application Support which is usually on the Macintosh HD volume. In either case, the instructions we'll get to shortly will help you find the iTunes/Finder backups on your computer.
A popular way to work around the limitations in using this storage location in the user account data is to use junctions (Windows) or symbolic links (a.k.a. "symlinks" macOS) to redirect a folder to another drive. We can use this same trick to relocate your iPhone and iPad backups made in iTunes or Finder to another location if you want to do that.
One quick caveat: If you use symlinks/junctions to redirect to a network-shared drive, please remember your drive connection isn't as stable as a local drive or USB external. Network shared drives tend to have connections that time out or go intermittent, which is ok for copying files to and from usually, but don't work as well for apps expecting a stable consistent connection to read/write, like the iOS backups need. iTunes/Finder doesn't really "notice" when drive connectivity is lost, so using a drive with intermittent/buggy connection is bad news because you won't find out if the drive connection went down while you were making backups.
Storing your iTunes backups to an external drive on Windows using junctions
I am going to refer to your primary drive as C:\ and your external drive as D:\, please change the drive letters appropriately for your main hard drive and external drive letters.
We have to get to your existing iTunes stored backups, move them to the drive/location that you want, and then create the junction (link) from the usual app data folder to your real location on the different drive.
Depending on which version of iTunes you use, the location where the iOS backups are stored is different. Those two locations are:
-
%appdata%\"Apple Computer"\MobileSync\Backupfor iTunes downloaded from Apple's website. -
%userprofile%\Apple\MobileSync\Backupfor iTunes installed from the Microsoft Store on Windows 10 and 11.
Follow these steps to set up iTunes to back up your iPhone to an external drive on Windows
-
Close iTunes if it's open now. (Very important, since we're moving around the files it uses!)
-
Let's get to that iTunes Backup folder.
- Windows 10 and 11: In the Windows search bar, paste
%userprofile%\Apple\MobileSync\Backupor%appdata%\"Apple Computer"\MobileSync\Backup(depending on the version of iTunes you have, or try both and see which one works) and press return/enter. A file browser window will open to the MobileSync folder. - Windows 8: In the Windows search bar paste
%appdata%\"Apple Computer"\MobileSync\(with the percents) and press return/enter. A file browser window will open to the MobileSync folder. - Windows 7, Vista, and XP: From the start menu, select Run. In the run box, paste
%appdata%\"Apple Computer"\MobileSync\(with the percents) and press return/enter. A file browser window will open to the MobileSync folder.
- Windows 10 and 11: In the Windows search bar, paste
-
Inside of the MobileSync folder that opened, you should see a sub-folder named
Backup. This entire folder contains backups made in iTunes, so this will be the folder we relocate. -
Go to the drive that you would like to store your iPhone backups on, and move that
Backupfolder to where you would like to store the data. If you want to start fresh, you could also delete the existingBackupfolder, and just create a new empty folder where you would like to store the backups. I'm going to assume you moved the existing folder to beD:\Backup-- it can be anywhere and named anything you like though. -
And now, we link them together! We want to start a Command Prompt with administrator privilege. (We need admin permission to create a folder junction where we want to make it.)
Windows 7 and Vista:
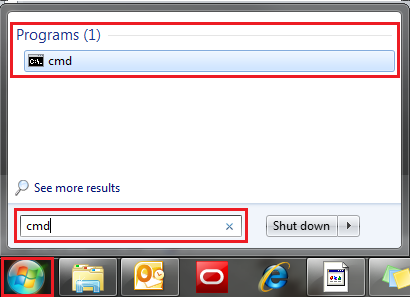
- Open the Start menu by clicking the orb in the bottom left-hand corner of the screen.
- Type
cmdin the search bar at the bottom of the menu. - Right-click on cmd in the search results for Programs, and select Run as administrator. Depending on your computer settings, you may be asked to provide an administrator password before you can continue.
Windows 8:
- Move the mouse to the upper right-hand corner of the screen to make the vertical menu bar appear. Click Search.
- Type
cmdin the search bar and hit the Enter key on your keyboard. - Right-click on cmd in the search results for Programs, and select Run as administrator. Depending on your computer settings, you may be asked to provide an administrator password before you can continue.
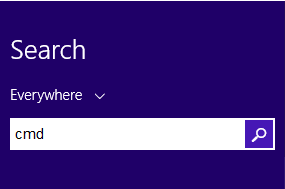
Windows 10 and 11:
- Tap the the magnifying glass (search, next to the windows/start menu button), type in
cmd, and a search result will appear for Command Prompt. - Right-click on that and select "Run as Administrator." Depending on your computer settings, you may be asked to provide an administrator password before you can continue.
-
A black box with a flashing cursor will open; this is the Command Prompt.
-
In the Administrator Command Prompt, type or paste:
(iTunes downloaded from Apple's website)
mklink /j "%appdata%\Apple Computer\MobileSync\Backup" "D:\Backup"
(iTunes downloaded from the Microsoft Store)
mklink /j %userprofile%\Apple\MobileSync\Backup "D:\Backup"
Note that I am lazy, so instead of typing out the long path to the original Backup folder location, I used the system abbreviation %appdata% or %userprofile%, with the percents.
Please remember to replace D:\"Backup" with the right drive letter and location/name of the relocated Backup folder.
To paste into the command prompt window, right-click the window title bar, click Edit on the menu, and click Paste.
You'll see a message like
Junction created for C:\app data stuff\Backup <<===>> D:\Backup
Storing your iTunes/Finder backups to an external drive on macOS using symbolic links (symlinks)
We're going to go find your existing iOS backups folder, move it to the drive you want to store it on, and then setup the symlink to from the original location to your new location.
Follow these steps to set up Finder or iTunes to back up your iPhone to an external drive on macOS
-
If you're on an older Mac using iTunes, close iTunes if it's open now. (Very important, since we're moving around files the it uses!)
-
Open Finder, and select the
Gomenu at the top of the screen. Hold the Option key and select theLibrarymenu option from the Go menu. (On OS X Lion and above, Library will only appear with the Option key held. On some macOS Sierra configurations, Shift + Option may be needed to get the Library menu item to appear.) -
From there, open the folder
Application SupportthenMobileSync. Now we're in the folder "~/Library/Application Support/MobileSync" or your user account's application data folder. You should see a folder namedBackupthere. Each folder inside of Backup is an iOS backup. -
Move that Backup folder to wherever you would prefer to store it. You can also rename Backup to whatever you like.
-
Now let's make the symbolic link! Click the macOS Spotlight search (the magnifying glass in the upper right corner) and type
Terminal. Then press enter to open the program Terminal. -
In terminal, the command we're going to be typing is:
ln -s YOUR_EXTERNAL_FOLDER ~/Library/Application\ Support/MobileSync/Backup
replacing YOUR_EXTERNAL_FOLDER with your moved Backup folder. An easier way to do all of this is the following:
-
Type
ln -sfollowed by a space, and don't press return yet. -
Drag your Backup folder from the external drive onto the Terminal window this will fill in the location of the external drive for you.
-
Copy and paste
~/Library/Application\ Support/MobileSync/Backupand then press return.
Here's a few great additional references describing the same process for relocating your iPhone and iPad backup folders to an external drive:
Is it possible to backup iOS devices to an external drive? - Ask Different - macOS
iPhone/iPad back up to different hard drive? - Ask Different - Windows